

How To Draw Curves In Inkscape
Y'all can ingather an image in Inkscape in means similar to raster programs such every bit Photoshop or Gimp.
Utilize whatever of the post-obit methods:
- Clipping: Utilise shapes, objects, or paths to crop
- Masking: Crop using any vector object, but as well gradients and blur
- Pattern: Use handles to crop and convert to path to sculpt your crop
In this footstep-by-pace tutorial, I show yous 17 ways in which y'all tin can use Inkscape to crop both pixel and vector images.
Let'south get started.

Method 1: Crop an Image by Clipping
The clip operation in Inkscape lets yous identify a vector shape, object or path on top of an paradigm in order to "clip" or cut a portion of that prototype co-ordinate to the shape used.
Information technology's like using a cookie cutter to create a cookie from dough.
With clipping, y'all tin crop in Inkscape by using regular shapes, objects such as text, or paths.
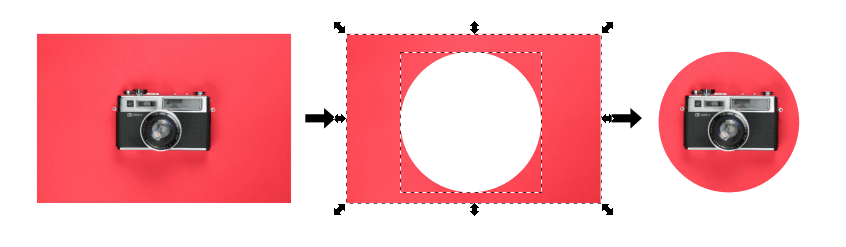
1. Clip Using Shapes
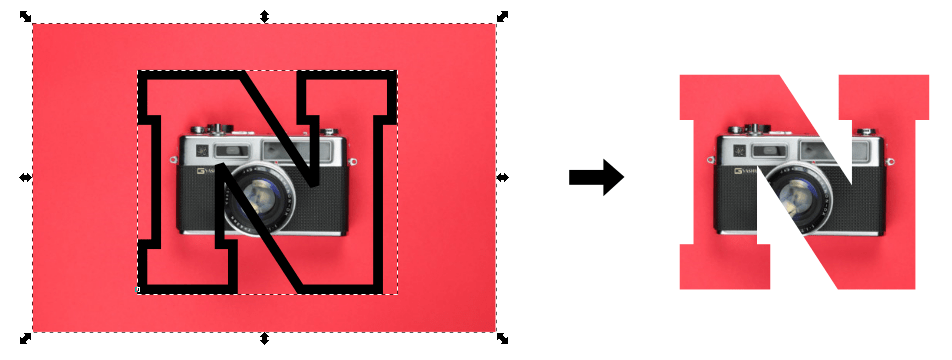
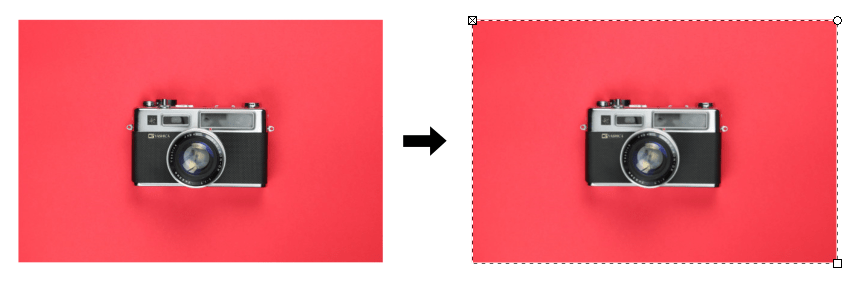
To prune an image (assuming y'all've imported your image to Inkscape), first create the shape you'll be using to clip or cut your paradigm. You can use squares, circles, stars, or whatsoever other shape).
Next, place the shape on superlative of the image in the area you wish to crop, and select both the prototype and shape, like so:
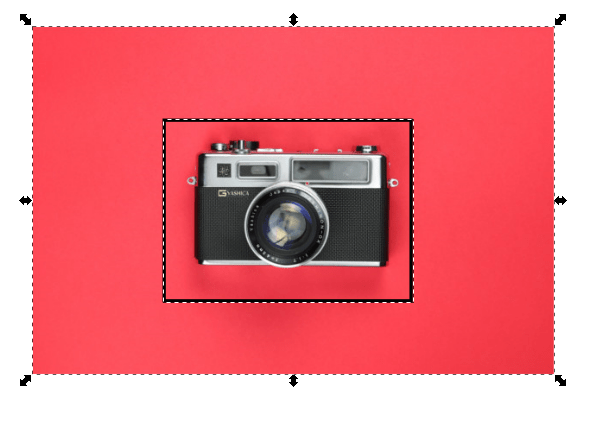
Note that the clipping shape or object ever goes on summit of the image to be clipped.
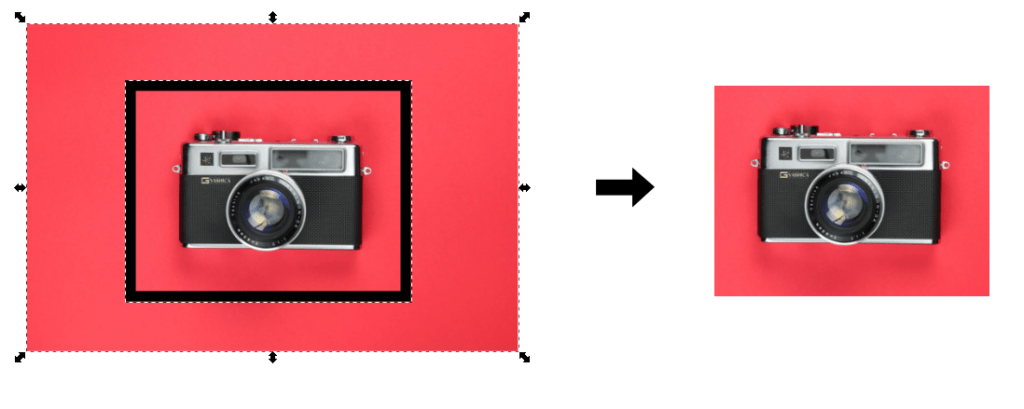
Now, go to Object > Clip > Set to apply clipping and ingather the epitome.
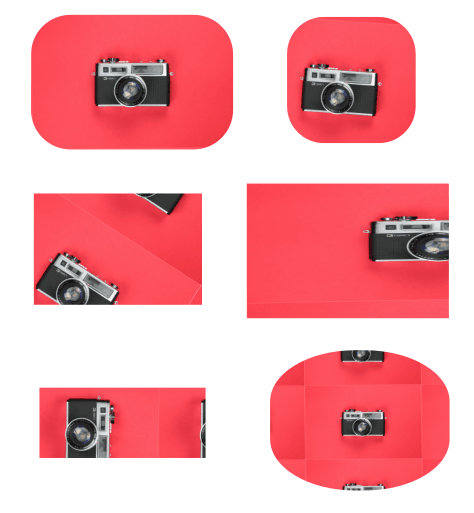
The epitome is now cropped according to the shapes you use to clip (in this case, a foursquare):
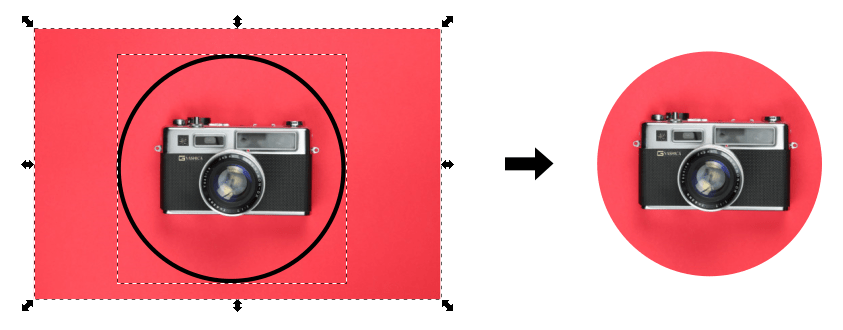
Y'all can too use circles:
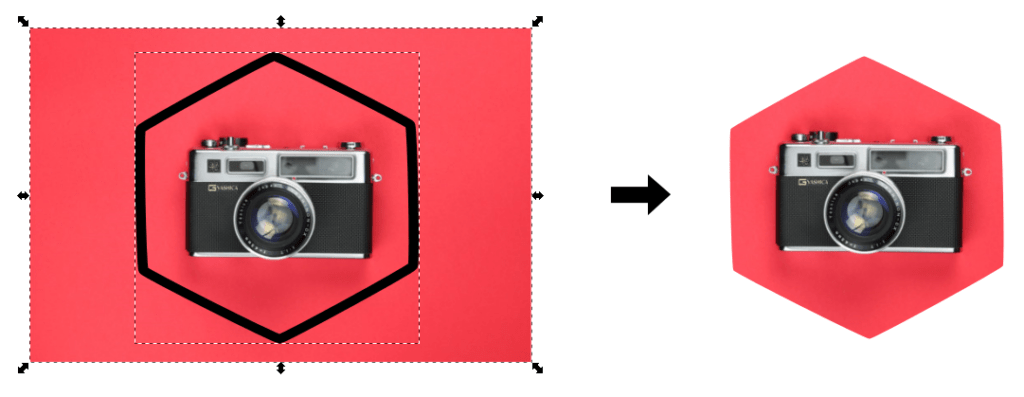
Yous tin use polygons and stars:
You can fifty-fifty utilize a vector object, such as text:
In addition, y'all can apply multiple shapes or paths for cropping images in Inkscape.
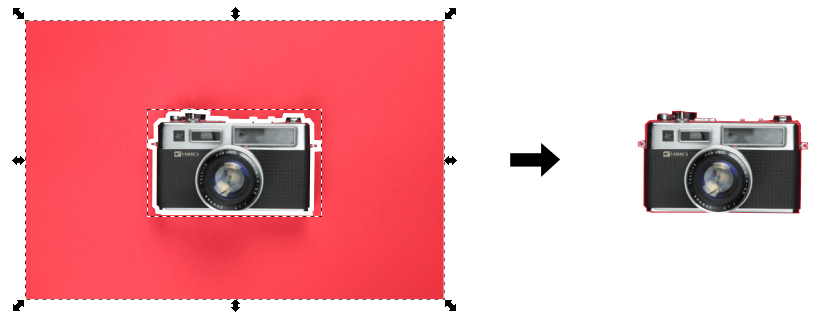
2. Clip Using a Path
Instead of shapes, yous can also create your own path in order to crop in Inkscape.
One way to practice this is to use the Pen Tool (or any drawing tool, such as Pencil) to carefully draw around the shape you wish to crop.
The more than patient your are, the more precise the ingather. Remember that you tin can also sculpt the nodes of the path for fifty-fifty more precision:
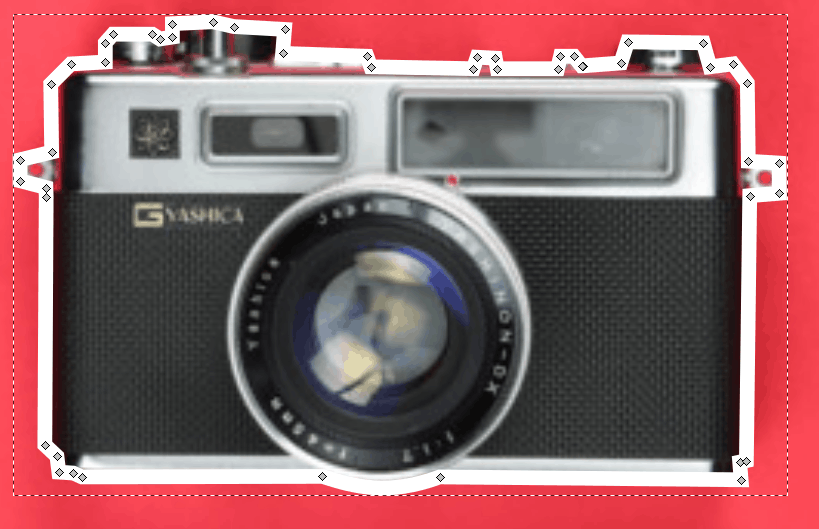
At present, you can become to Object > Clip > Gear up to crop your epitome:
Method 2: Crop an Epitome by Masking
Masking works in a way very similar to clipping, simply with some important advantages.
First, access the tool in Object > Mask> Set :
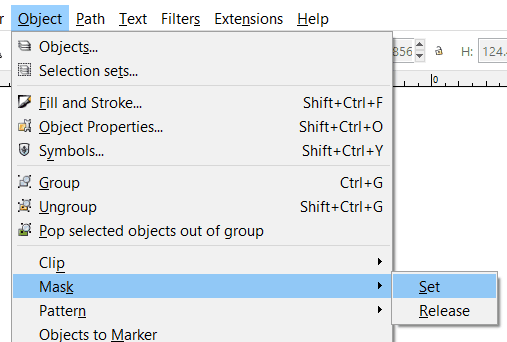
Like clipping, you can use masking with shapes, objects, and paths, like so:
Withal, masking allows for gradients and blurs to alter the cropping in special ways. This ways you tin can crop images with feathered edges or translucent areas.
This is the main dominion with masking:
- The office of an object with white fill up or border volition allow the object below to be visible .
- The part of an object with black fill or border volition block whatever part of the object beneath it.
- Anything in between (all shades of grey) will get gradually transparent , with corresponding effects on the object beneath.
Allow'due south take a look at some examples of masking:
You tin can mask an object by using regular shapes or paths and using different shades of grey in their border or stroke.
Here, I'm using a thick grey stroke on a white circle:

Here, I utilise the calligraphy pen on the marking setting to draw a grey stroke over the paradigm:
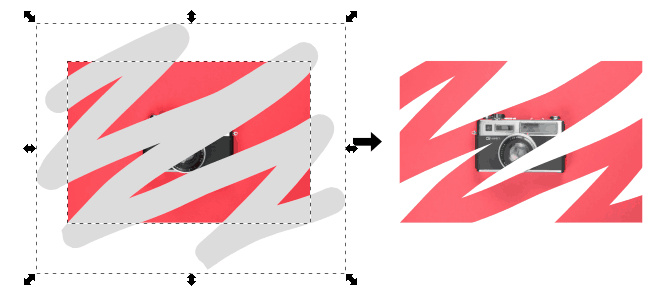
Recall that you can utilise any shape, stroke, or path.
Furthermore:
You can play with shapes and shades of grey to create even more crawly image cropping, like this:
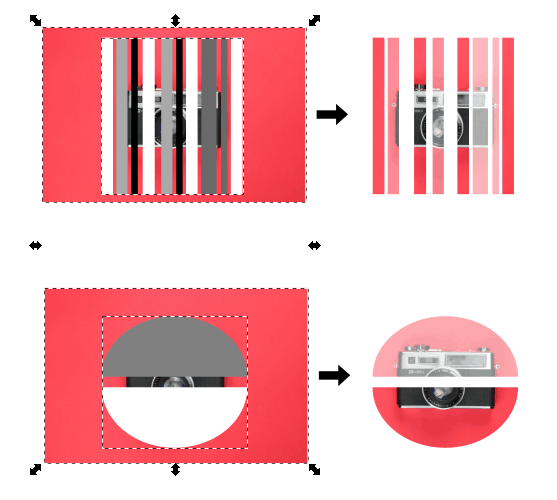
Simply be sure to group objects (CTRL + G) before masking.
Here's some other great feature of masking in Inkscape:
You tin can play with gradients and blur to create interesting image cropping. Here, I'm using a simple gradient to mask my paradigm:
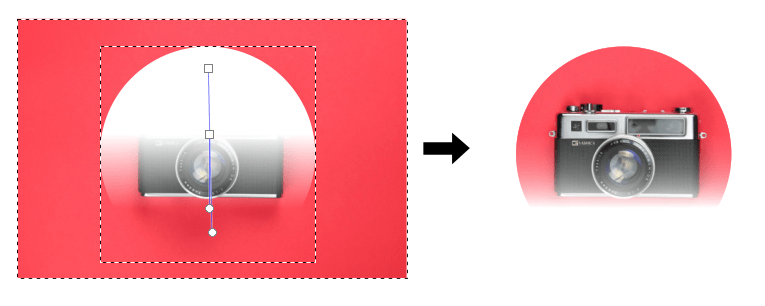
Adjacent, I'thousand using gradients with dissimilar stops, applying black and grey to gradient nodes:
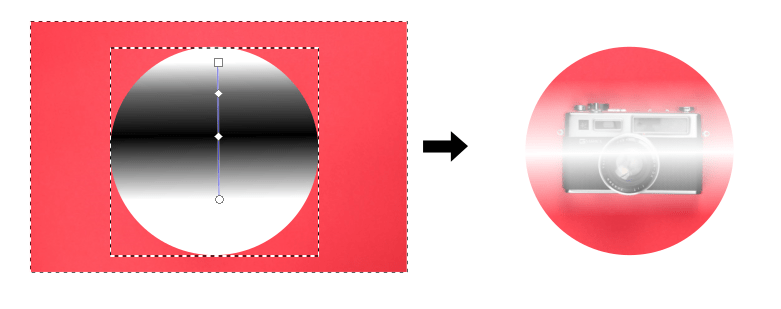
Finally, you can yous utilise masking, a shape, and a unproblematic blur to crop an image in Inkscape, like this:

Method 3: Crop an Image by Pattern
The concluding method you tin use to crop an image in Inkscape is by applying a pattern to the paradigm.
You can apply a blueprint to an epitome or vector object by going to Object > Design > Objects to Pattern:

Inkscape then creates a design of your image that you tin can transform by means of special handles similar to those used past the square tool.
To practise this, first apply the blueprint, select your image, and and so select the squares tool to bear witness your new editing handles:
Now you tin can play a little with the nodes and handles to crop your image in interesting ways:
Cropping an Image in Inkscape is Easy
Cropping an image in Inkscape tin can be very convenient for several reasons:
- Information technology'southward easy to apply
- It'south convenient not to apply a raster programme such as Gimp or Photoshop, as you lot work in a vector program
- It's quick and efficient
At present you know three different methods to crop an prototype in Inkscape and 17 dissimilar ways you can utilize them.
Which one are you going to use and how?
Are you ready to create a logo in Inkscape? Check out these awesome tutorials:

Almost the Author:
Ruben Ramirez teaches digital media in college and started Cocky-Fabricated Designer to share his knowledge of graphic design. He loves skateboards, guitars, and vector graphics.

Source: https://www.selfmadedesigner.com/cropping-inkscape/
Posted by: lesherporwhou.blogspot.com
0 Response to "How To Draw Curves In Inkscape"
Post a Comment